> For the complete documentation index, see [llms.txt](https://docs.nmkr.io/llms.txt). Markdown versions of documentation pages are available by appending `.md` to page URLs; this page is available as [Markdown](https://docs.nmkr.io/jp/nmkr-studio/nachtoriaru/howaitorisutono.md).
# ホワイトリストの設定方法
トークンを購入できるユーザーを指定するためにホワイトリストを設定します
[ホワイトリストは](https://docs.nmkr.io/nmkr-studio/set-up-sales/sales-conditions-and-whitelisting/whitelist-with-count)、NFTのドロップに使用される最も一般的な[販売条件](https://docs.nmkr.io/nmkr-studio/set-up-sales/sales-conditions-and-whitelisting)です。
これは、プロジェクトでトークンを購入できるウォレットアドレスを事前に設定します。
NMKR Studioでは、各アドレスが個別に購入できるトークンの量を設定することもできます。
**1) アドレスを収集する**
最初のステップは、ホワイトリストに登録したいアドレスを集めることです。
これを手動で行うこともできますし、特定の[ポリシーの](https://docs.nmkr.io/nmkr-studio/project/policy)所有者をホワイトリストに登録したい場合は、内蔵の[ポリシースナップショットツールを](https://docs.nmkr.io/nmkr-studio/tools/policy-snapshot)使用することもできます。
**2) csvファイルの作成**
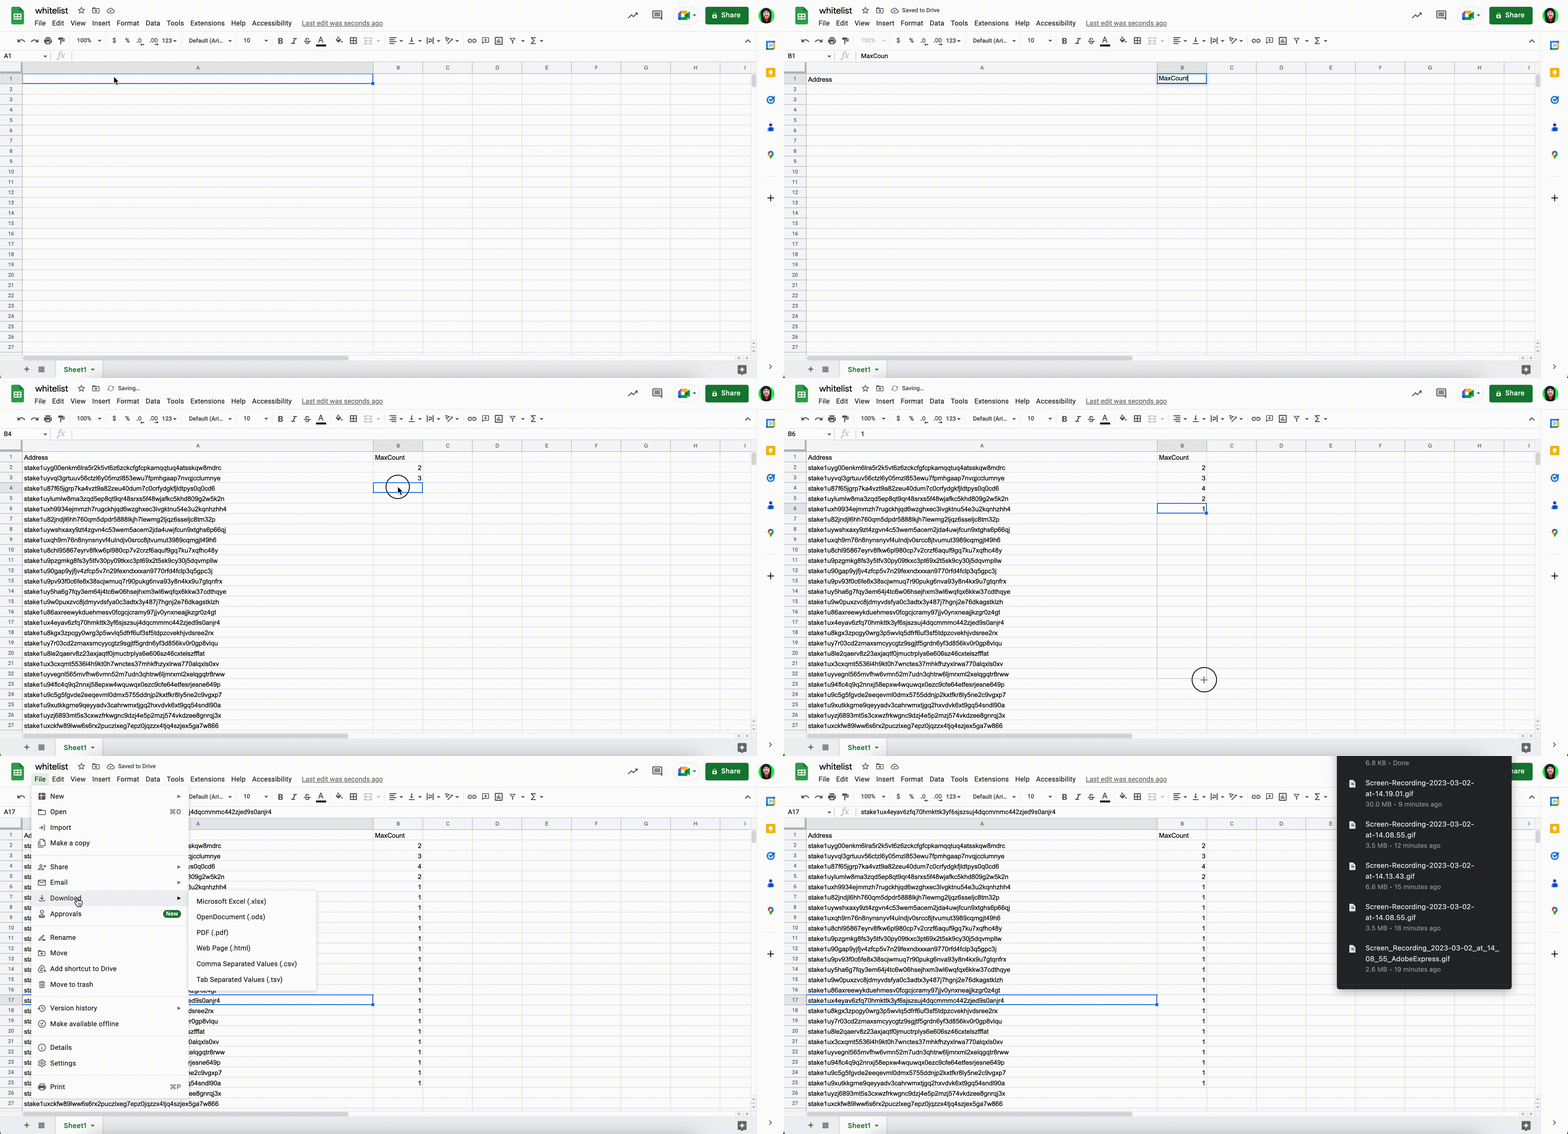
csvファイルは、ExcelやGoogle Sheetsのようなあらゆる表計算ソフトで作成できます。最初の行の1列目に「Address」、2列目に 「MaxCount」と書きます。次に、1行目の下の1列目に収集したすべてのアドレスを追加します。
2列目には、すべてのアドレスに対して個別に金額を指定します。
ファイルをcsvでダウンロードします。
**3) ホワイトリスト販売条件の設定**
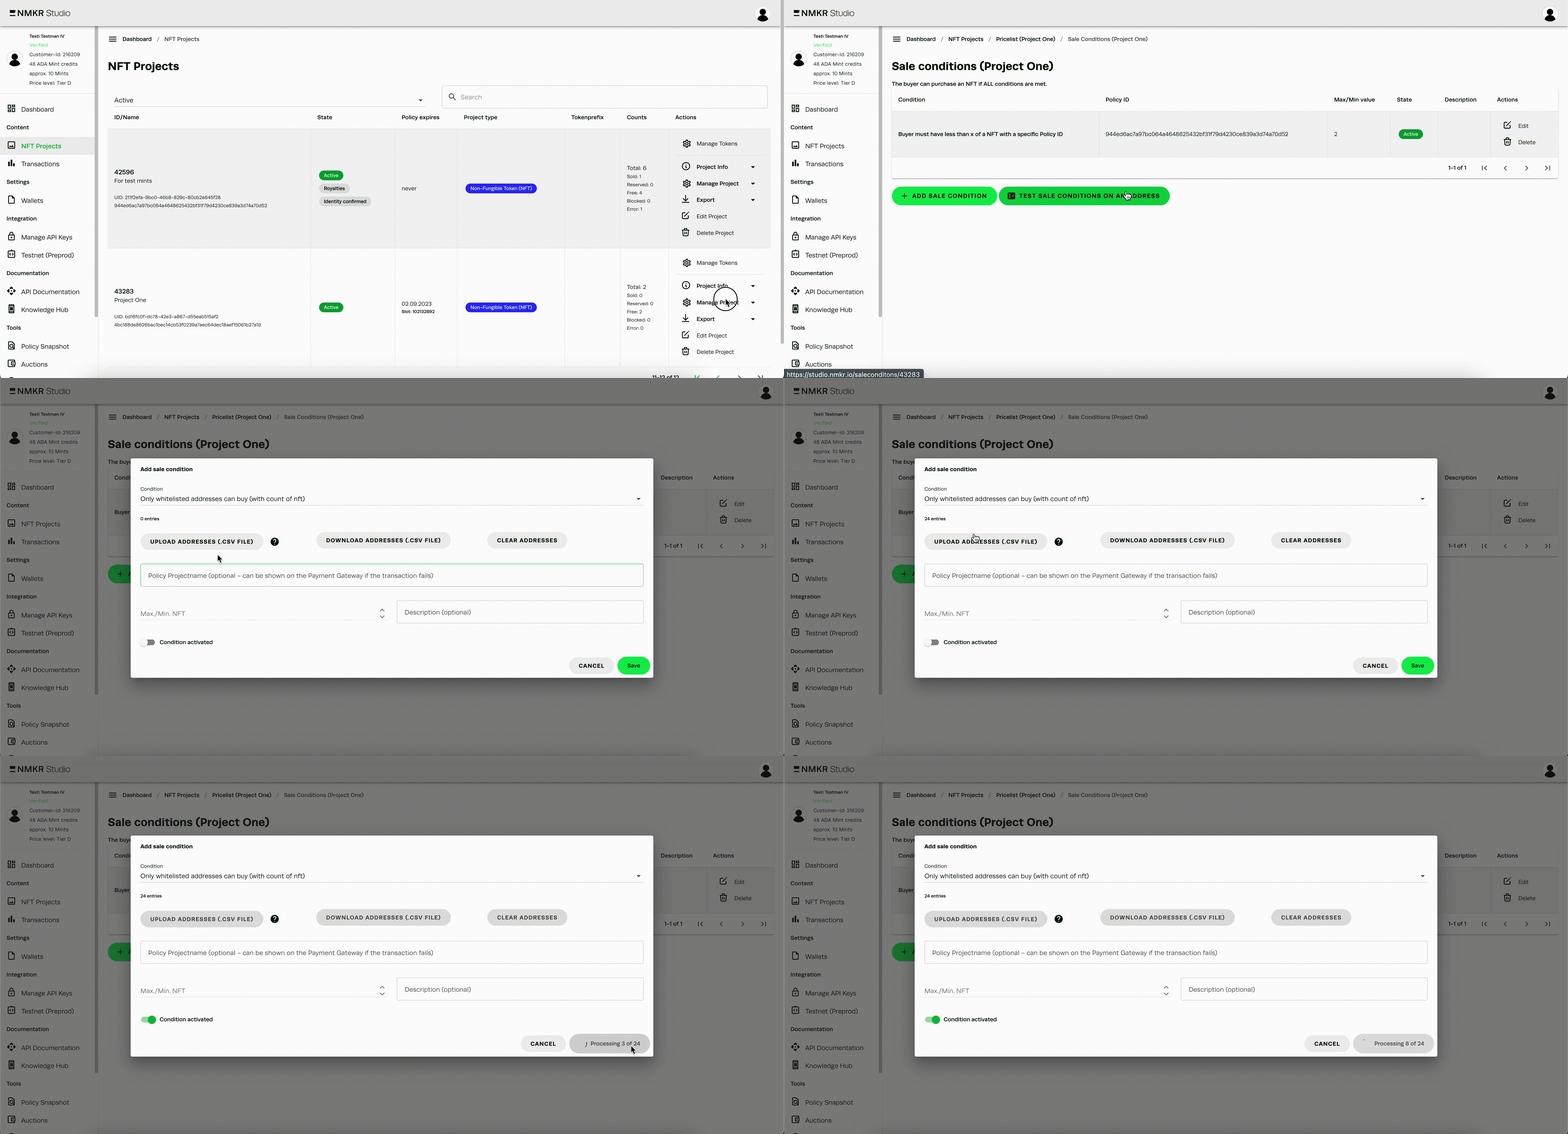
[プロジェクト概要に](https://docs.nmkr.io/nmkr-studio/token/manage-tokens-tab)移動し、ホワイトリスト販売に使用する[プロジェクトの](https://docs.nmkr.io/nmkr-studio/project)右側にある「プロジェクトを管理」から「NFT価格を設定」を選択し、[価格リストタブを](https://docs.nmkr.io/nmkr-studio/set-up-sales/manage-prices-pricelist)開きます。
「販売条件」をクリックし、次のタブで「新しい販売条件を追加」をクリックします。
「[カウント付きホワイトリスト](https://docs.nmkr.io/nmkr-studio/set-up-sales/sales-conditions-and-whitelisting/whitelist-with-count)」を選択し、アドレスをアップロードし、条件を有効にして「保存」をクリックします。
これで販売条件が有効になりました!
**詳細**
このトピックについてもっと知りたい方は、こちらを[ クリック](https://docs.nmkr.io/nmkr-studio/set-up-sales/sales-conditions-and-whitelisting/whitelist-with-count)してください。