NMKR Docs
ProductsContact
English
English
  • Welcome to NMKR Docs
  • Introduction
    • About NMKR
    • Powered by NMKR
    • What is an NFT?
      • What is IPFS?
    • Why Cardano?
  • NMKR Studio
    • Introduction - NMKR Studio
    • Features Overview
    • 🖥️Learn NMKR Studio in 3 minutes
      • Basic Workflow
    • How to - Quick Start Tutorials
      • Quickstart Full Video Tutorial
      • Guidelines Planning a Project
      • How To Add Tokens
      • How to set up Metadata
      • How To Sell Tokens
      • How To Set Up Sales Conditions
      • How To Do a Reveal
      • How To Burn Tokens
      • How To Enable Royalties
      • How To Enable DIDs
      • How To Set up Whitelisting
      • How to Airdrop Tokens
    • Pricing
    • Account
      • Registration & KYC
      • Security
      • Wallets
      • Mint Coupons
      • Dashboard
      • Transactions
      • Invoices
      • API Keys
    • Project
      • Policy
        • Managing policies
      • Create
      • Edit
      • Metadata Template
      • Statistics
      • DID - Decentralized Identifier
      • Notifications
      • Royalties
      • Additional Payout Wallets
      • Affiliate links
      • Export Metadata as Zip
      • Export NFT as csv
      • Mint and Send Jobs
      • Export placeholder.csv
    • Token
      • Manage Tokens Tab
      • Upload
        • Upload single tokens
        • Bulk Upload Files and Metadata
          • Bulk Upload via Drag and Drop
          • Bulk upload via SFTP
      • Edit
      • Metadata
        • Add Token-specific Metadata
        • Fingerprint (Metadata preview)
        • Metadata Check
        • Metadata Standard for fungible Tokens
        • Fully on-Chain NFTs
          • Partial URL-Encoding
        • CIP-68
      • Duplicate
      • Delete
      • Burn
      • Update (Edit after Mint / Reveal)
    • Set up Sales
      • Manage prices / Pricelist
        • Create new Prices
        • Free Drops
        • Custom Token payment
        • Discounts
      • Sales Conditions & Whitelisting
        • Sales conditions depending on policy ID or stake pool
        • Whitelist with Count
        • Blacklist
        • Test Sales Condition
      • Block Tokens
      • NMKR Pay
        • Set up NMKR Pay
        • MultiSig Payment
        • Website Integration
        • Specific Payment Links
        • Manual sending in NMKR Pay
        • FIAT ETH and SOL Payment
      • Pay-In Address
      • Auction
    • Minting
      • Minting on Demand
      • Manual Minting
      • Airdropper
        • Airdrop with random distribution
        • Airdrop with specific distribution
    • Tools
      • Managed Wallets
      • Split Addresses
      • Direct Sales
      • Policy Snapshot
      • Integrations & Plugins
        • NFT Pal
        • Zapier
    • Testnet
      • Create Testnet Account
      • Testnet Wallet & tADA
      • Testnet API Swagger
  • NMKR Studio API
    • Introduction - NMKR Studio API
    • API Features
    • Swagger API Endpoints
    • Get started with the API
    • API Swagger
      • Get Started with the Swagger
      • Swagger Responses and Error Codes
    • API Examples
      • Users
        • Payout Wallets
        • Subcustomers
      • Project
        • Create Project
        • Upload File and Metadata
      • Payment
        • Create unique NMKR Pay Link for random Token sales
        • Create NMKR Pay Link for specific Token sales
        • Get Payment Address for single NFT sales with native Tokens
        • Create NMKR Pay Link for a multi-specific Tokens sale
      • Minting
        • Manual Minting
      • Smart Contract
        • Secondary Sales via NMKR Pay
    • API Open Source Contributions
  • NMKR Mint
    • Introduction - NMKR Mint
    • Mint single NFTs
    • Mint Collection
  • NMKR Playground
    • Introduction - NMKR Playground
    • ADA Payment Link
    • Paperwallet
  • NMKR Pool
    • What is Staking?
    • Stake with NMKR Pool
  • Helpful Links
    • Cardano NFT Ressources
    • Cardano Resources
    • Cardano Wallets
    • Open Source Repositories
    • Security Practices
    • Deal with Bots
Powered by GitBook
On this page
  • Create the whitelist as csv
  • Upload the whitelist
  • Monitor whitelist usage
  • Edit whitelist
  • Reupload a changed whitelist
  1. NMKR Studio
  2. Set up Sales
  3. Sales Conditions & Whitelisting

Whitelist with Count

Allow only whitelisted wallet addresses to buy tokens from your project

PreviousSales conditions depending on policy ID or stake poolNextBlacklist

This Sales Condition is to create the well known Whitelisting. Whitelisting means, that only previously specified addresses can buy tokens. In NMKR Studio that means you will upload a spreadsheet that contains the addresses and also the amount of tokens each specific address can buy from your project. Specifying the amount gives you a lot of flexibility to customize your minting.

If you need to collect the addresses of your user first, could be an option to do it.

Create the whitelist as csv

Please open Excel, Google Sheets or any other spreadsheet software and create a new file and format it like in the example below.

Address
MaxCount

You will now add one wallet address (not the Stake address) to every row in the spreadsheet in column A (Address) and specify the amount that this wallet should be able to buy in column B (MaxCount). There is no limit in the amount of addresses or amount of tokens, but please keep in mind that if you have more tokens added in the whitelisting than in the project itself, not everybody will be able to buy a token from your project. Your spreadsheet will now look like this:

Address
MaxCount

addr1qy55ts7h4txp9fre...ywnxs723f0x

1

addr1q8esrnq9vtn4k...gn3k9upqekx6lz

5

addr1q8xc4n8hkf0zu946...k9upqkelss5

2

Please make sure that the added addresses do not include any whitespaces. You can check for that in yous hseets software. select the column, rightclick and choose conditional formatting, format rule "text contains" and then write a single whitespace in the field. Choose a formating style like red background and confirm. All addresses can now be identified and fixed easily in the sheet.

Give the file a name and save it as CSV File (Comma Separated Values). There are no specifications about the name from our side.

We were reported that German versions of Excel may export the CSV with semikolon (;) separated values. This won't work! Please copy the complete spreadsheet to Google Sheets and export the file there.

Upload the whitelist

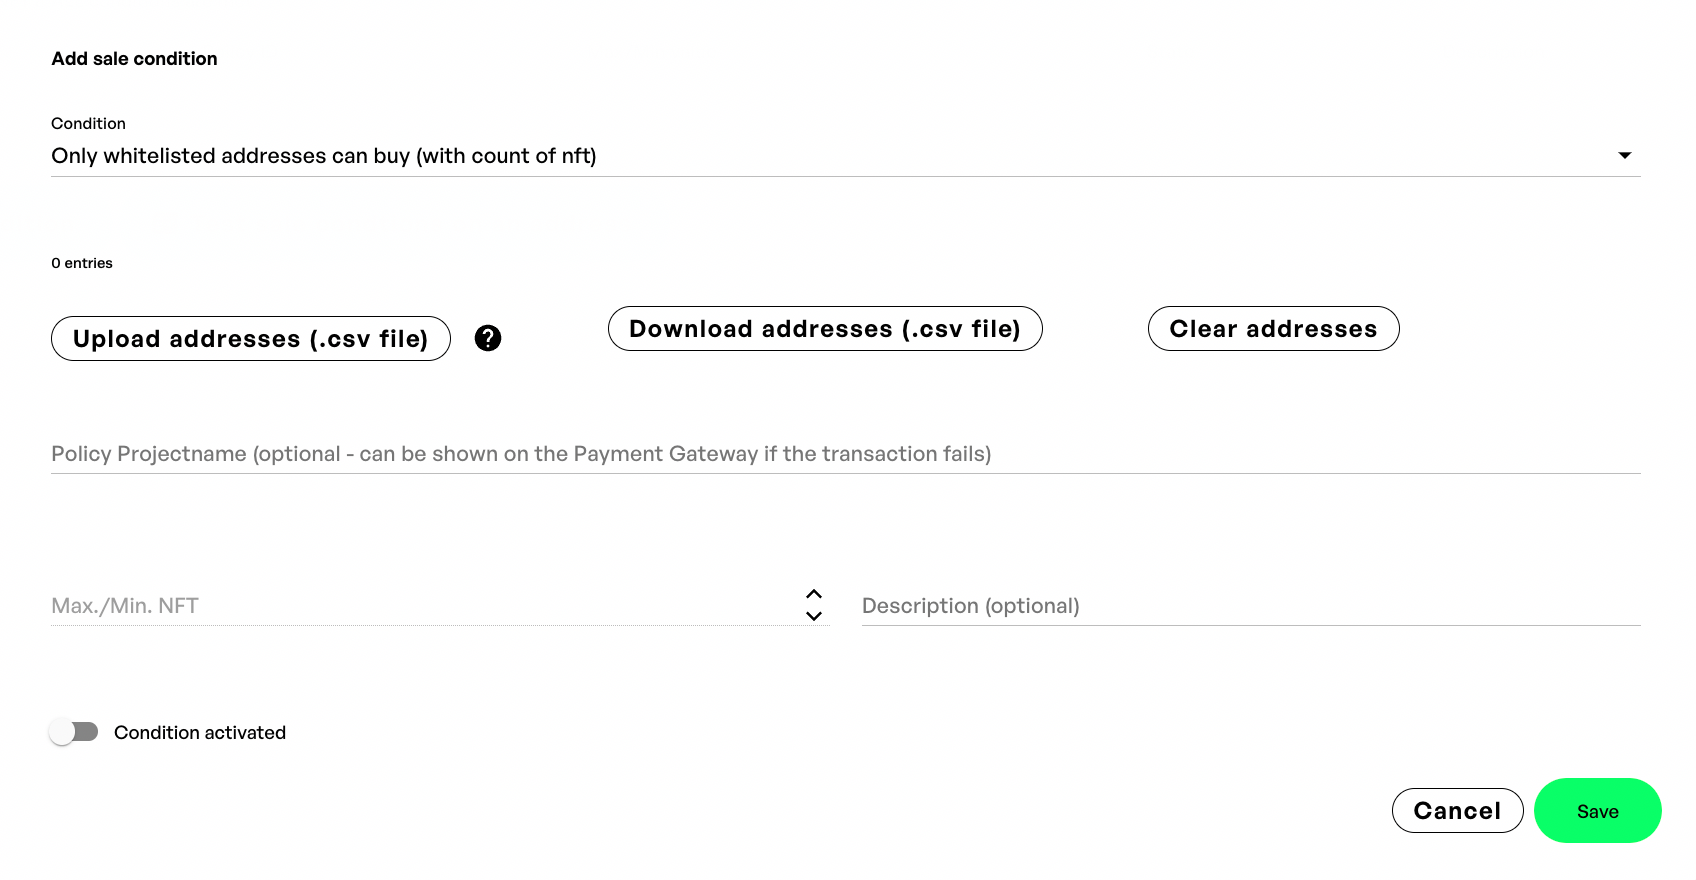
Select the previously created whitelist csv file and upload it. The count above the "Upload addresses (.csv file)" button will now show the number of recognized wallets.

For the whitelisting NMKR Studio will always convert the wallet address to a stake address and will use the stake address for the whitelisting. The buyers can now buy tokens with every address that is related to the stake address. If a steak address is unintentionally added multiple times because you added multiple different receiveraddresses of the same wallet it will only consider the entry with the highest "MaxCount".

If you add multiple wallet addresses to the white list that belong to the same stake address, only the

Monitor whitelist usage

By clicking on "Show whitelist usage" will open a new tab where you can monitor the sales for each single whitelisted address. It allows you to search by address in the search bar too.

By clicking the "Export Whitelist usage" button you can now also export this list as csv.

Edit whitelist

Please go to the whitelist usage tab, where you also want to monitor the addresses.

Add new addresses

To add a new address please click on "Add whitelist address" and submit the address and count there.

Remove addresses

To remove an address please click the trash button and confirm that you want to delete the address.

Change Count or address

The "Edit address" button allows you to change the address and the count of the whitelisted address.

Change the count or address and save the changes.

Reupload a changed whitelist

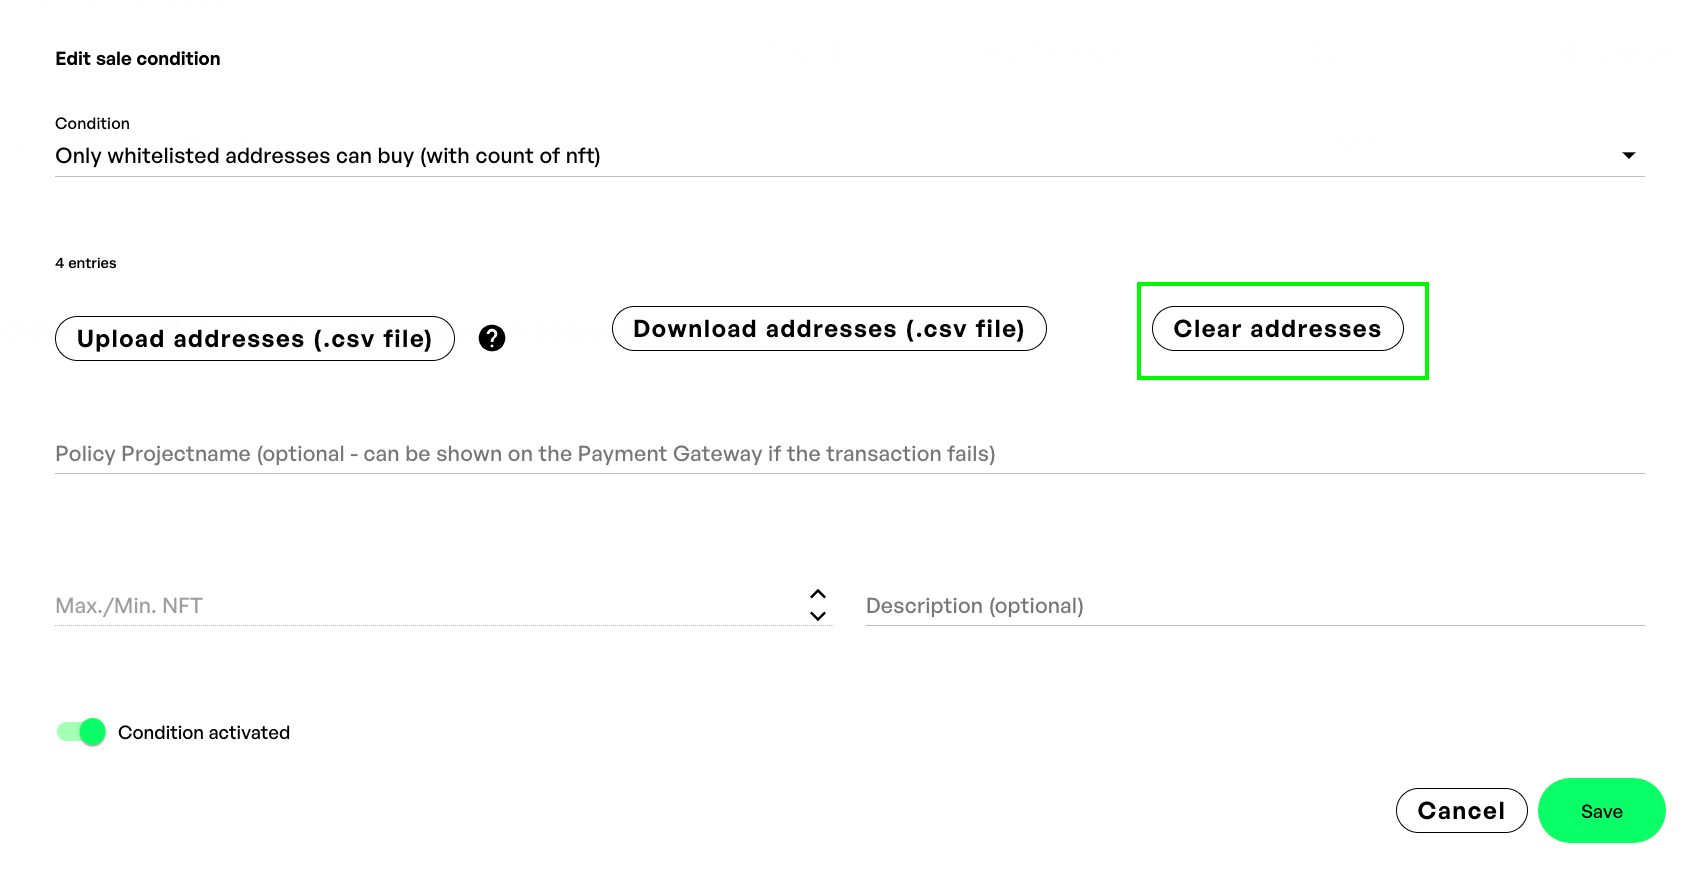
To reupload a new whitelist please go to the sales conditions tab and click the "edit" button in the actions on the right side of the whitelist sales condition.

The next step is to in NMKR Studio, go to the and click the "Add Sale condition" button. Select the "whitelisting with count" and click on "Upload addresses (.csv file)".
NMKR Studio allows you to manually edit the whitelist even after the update in the interface without needing to reupload a new file. This means you can , and from the NMKR Studio user interface during the sale.

Please click "clear address" first to reset the whitelist usage tracking and then

add the sales Condition
manage prices tab
upload the new file again
add new addresses
update the count of addresses
remove addresses
a policy snapshot
Set up the whitelist sales condition
Check the entries count if it fits to your whitelisted addresses
Monitor the whitelist usage
Go to whitelist usage tab
Add the new address and specify the count
delete address from whitelist