Update (Edit after Mint / Reveal)
How to edit tokens after the mint to fix errors and prepare your project for a reveal style sale
The metadata of the tokens can be edited as long as the policy is not locked. The policy ID and the asset_name of a Token can not be updated. The process takes 0.5 mint coupon for every NFT (2.25 ADA) that is updated from your accounts balance and the NFTs will remain in the holders wallet during the whole process.
To update the metadata of a token on the Blockchain we are going to mint a duplicate of the token that needs to be updated but with the correct metadata. When minted, this duplicate will override the current metadata of the original token. After the metadata is updated, the duplicate will be burned to restore the correct supply of the Token. This explains also why the asset_name and/or Policy ID can't be updated, it would not able to match the duplicate with the original on-chain. If you are curious, check the mint transaction of your token afterwards with cardanoscan.io, it will show one mint transaction, then another one(the newly minted token) and then a burn transaction).

Fix errors after mint (single Tokens)
Docs under rework. Because of a redesign, the button now says "Update". We will upload a new video and documentation soon.
If you only want to make changes to the Metadata text, then you can start the process by locating the particular NFT you want to edit and selecting the Remint And Burn option.
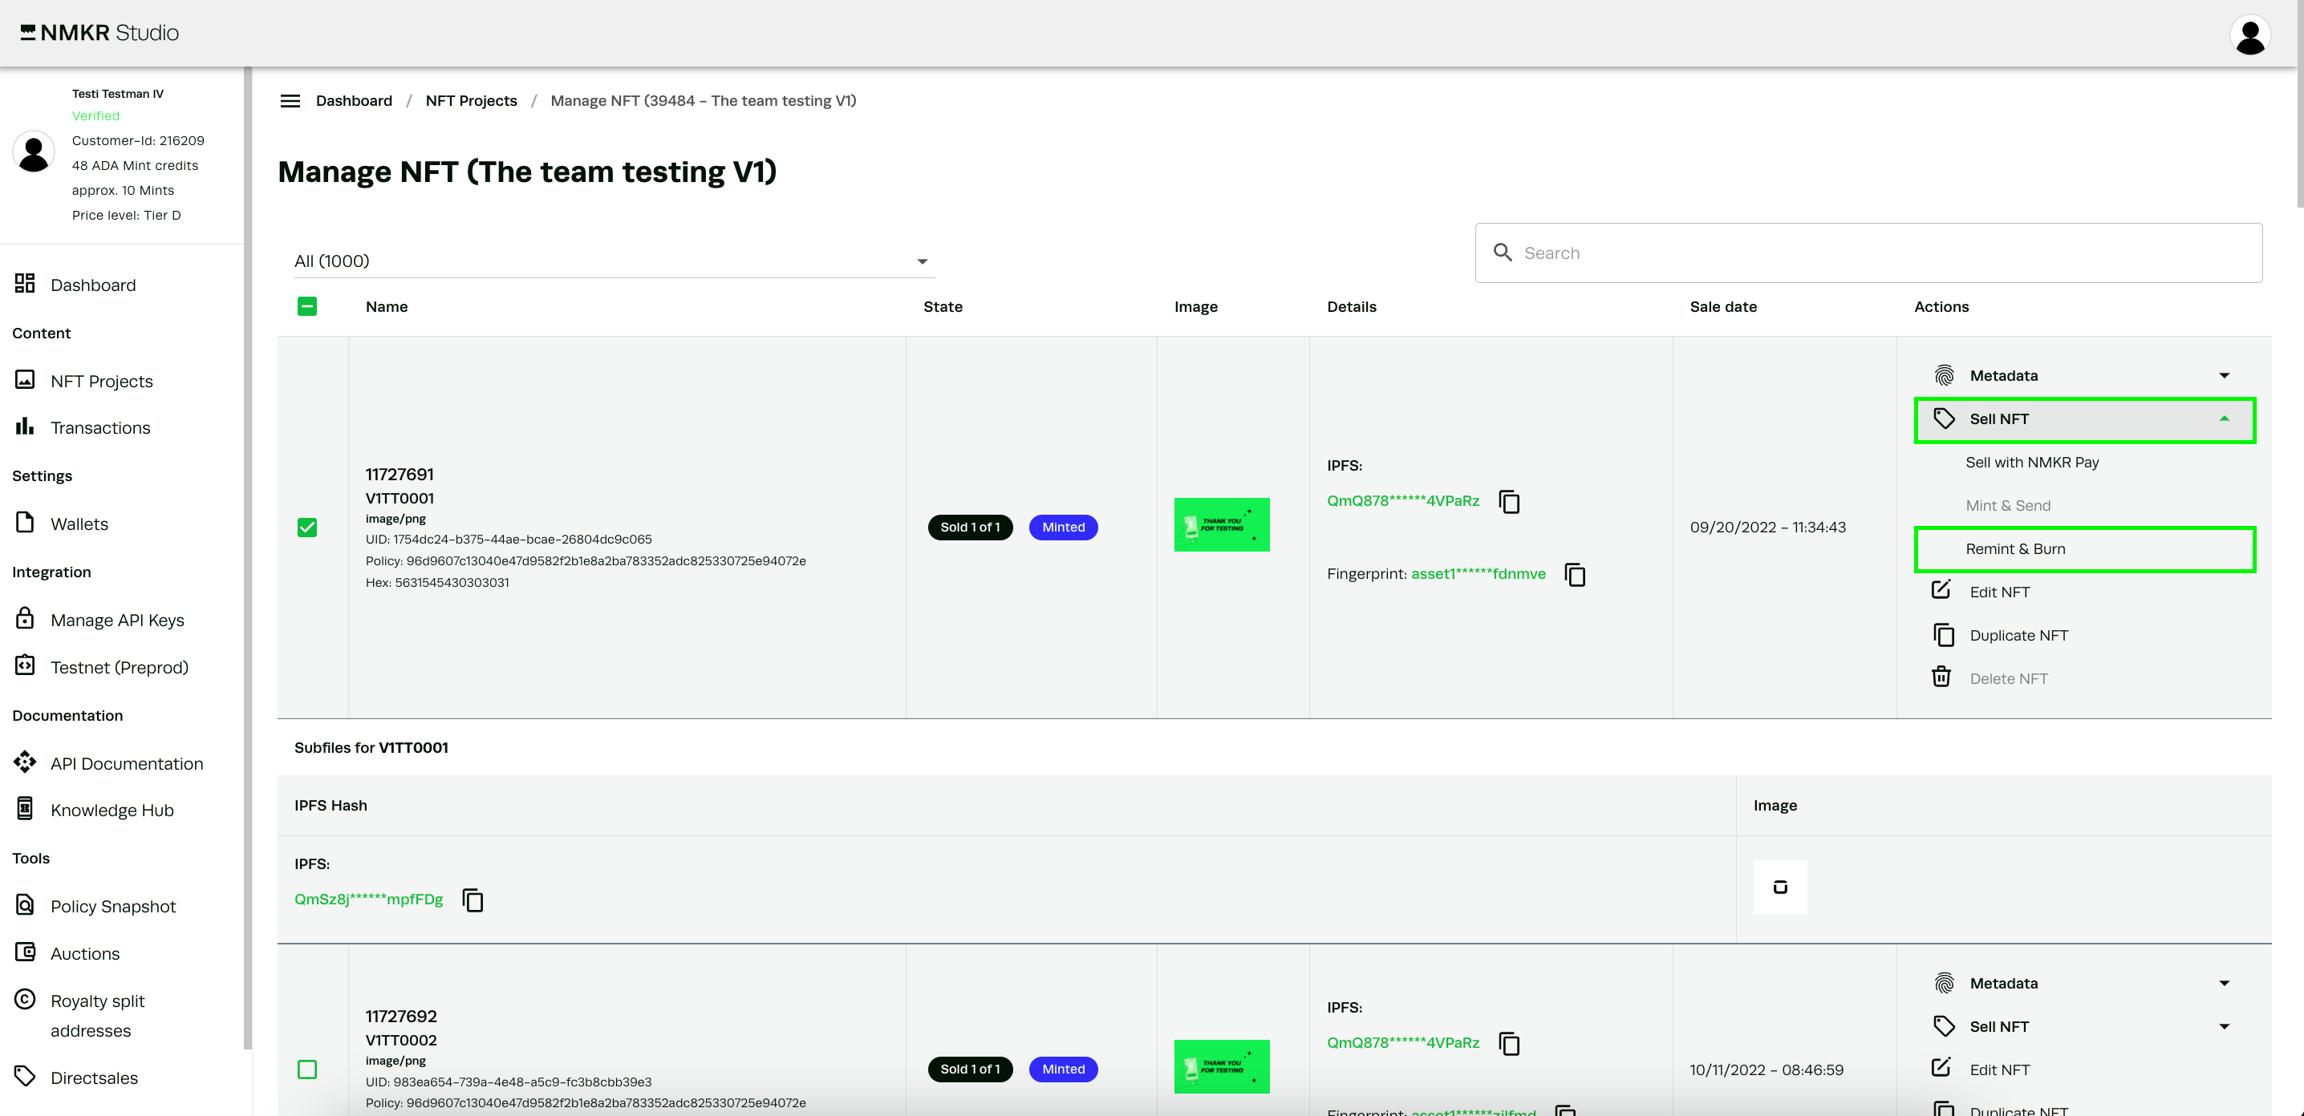
You can then edit the metadata in the lower box as you desire, but please make sure to not make any changes to the asset_name or the policy ID. These values can't be updated.
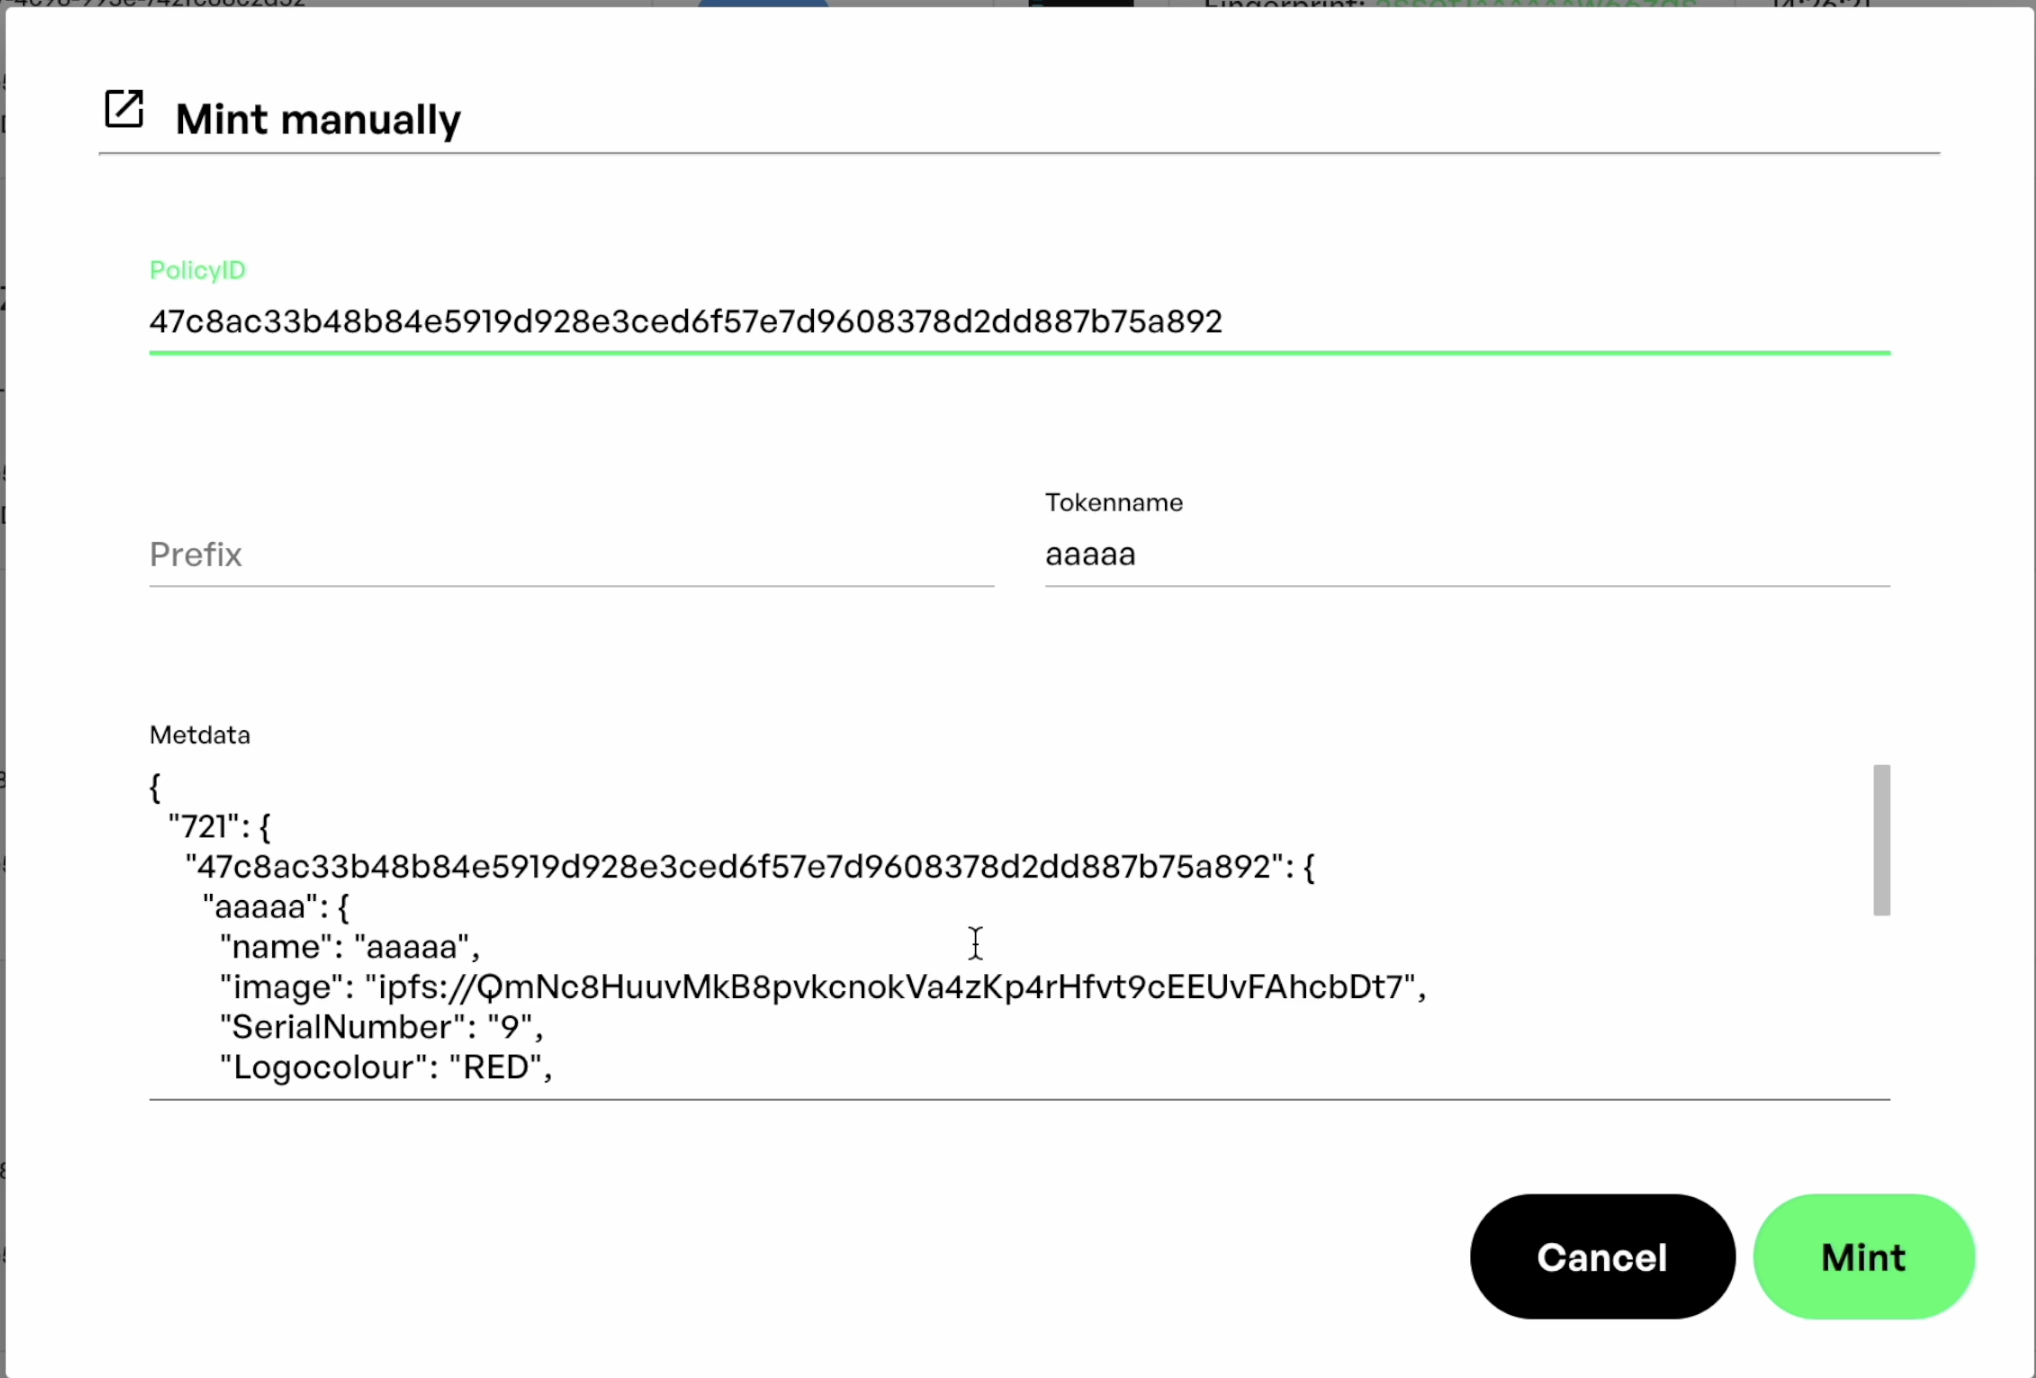
Once you've added all the changes, press on mint to push the changes on chain.
Editing images/files
Following on from the above tutorial, you would agree that actually, the Images/Media are also just metadata (most of the time). Because of this, we can also change the media by editing the IPFS hash value.
Note - this assumes that you are going to change an image, for another image. In the rare even you might want to change the media type, you should also update the mediaType value as needed.
The quick explanation for this, is that we are simply going to edit the IPFS Hash, inside the metadata for the images/media we want to change. If you already have another IPFS hash that you have created outside of NMKR Studio, then you can use that. If not, have a look at this section to see the best practise for using NMKR Studio.
What we are essentially going to do is make a dummy project for the purpose of getting an IPFS hash. It is important to make a totally new project for this, so that this data doesn't affect your active project that is minting.
The first step then is to create a brand new project, call it something like "Spare IPFS KEEP ME", this will remind you to not delete this project, as well as confirm that it is not meant to be a live project.
Put in the minimum information into the project creation window (this doesn't matter as we are not actually going to use the project).
You can then go straight to the Upload and Pin option - fill in the minimal details and upload the NFT

Again, we are doing this ONLY so that NMKR Studio creates a new IPFS link for us, for the new image.
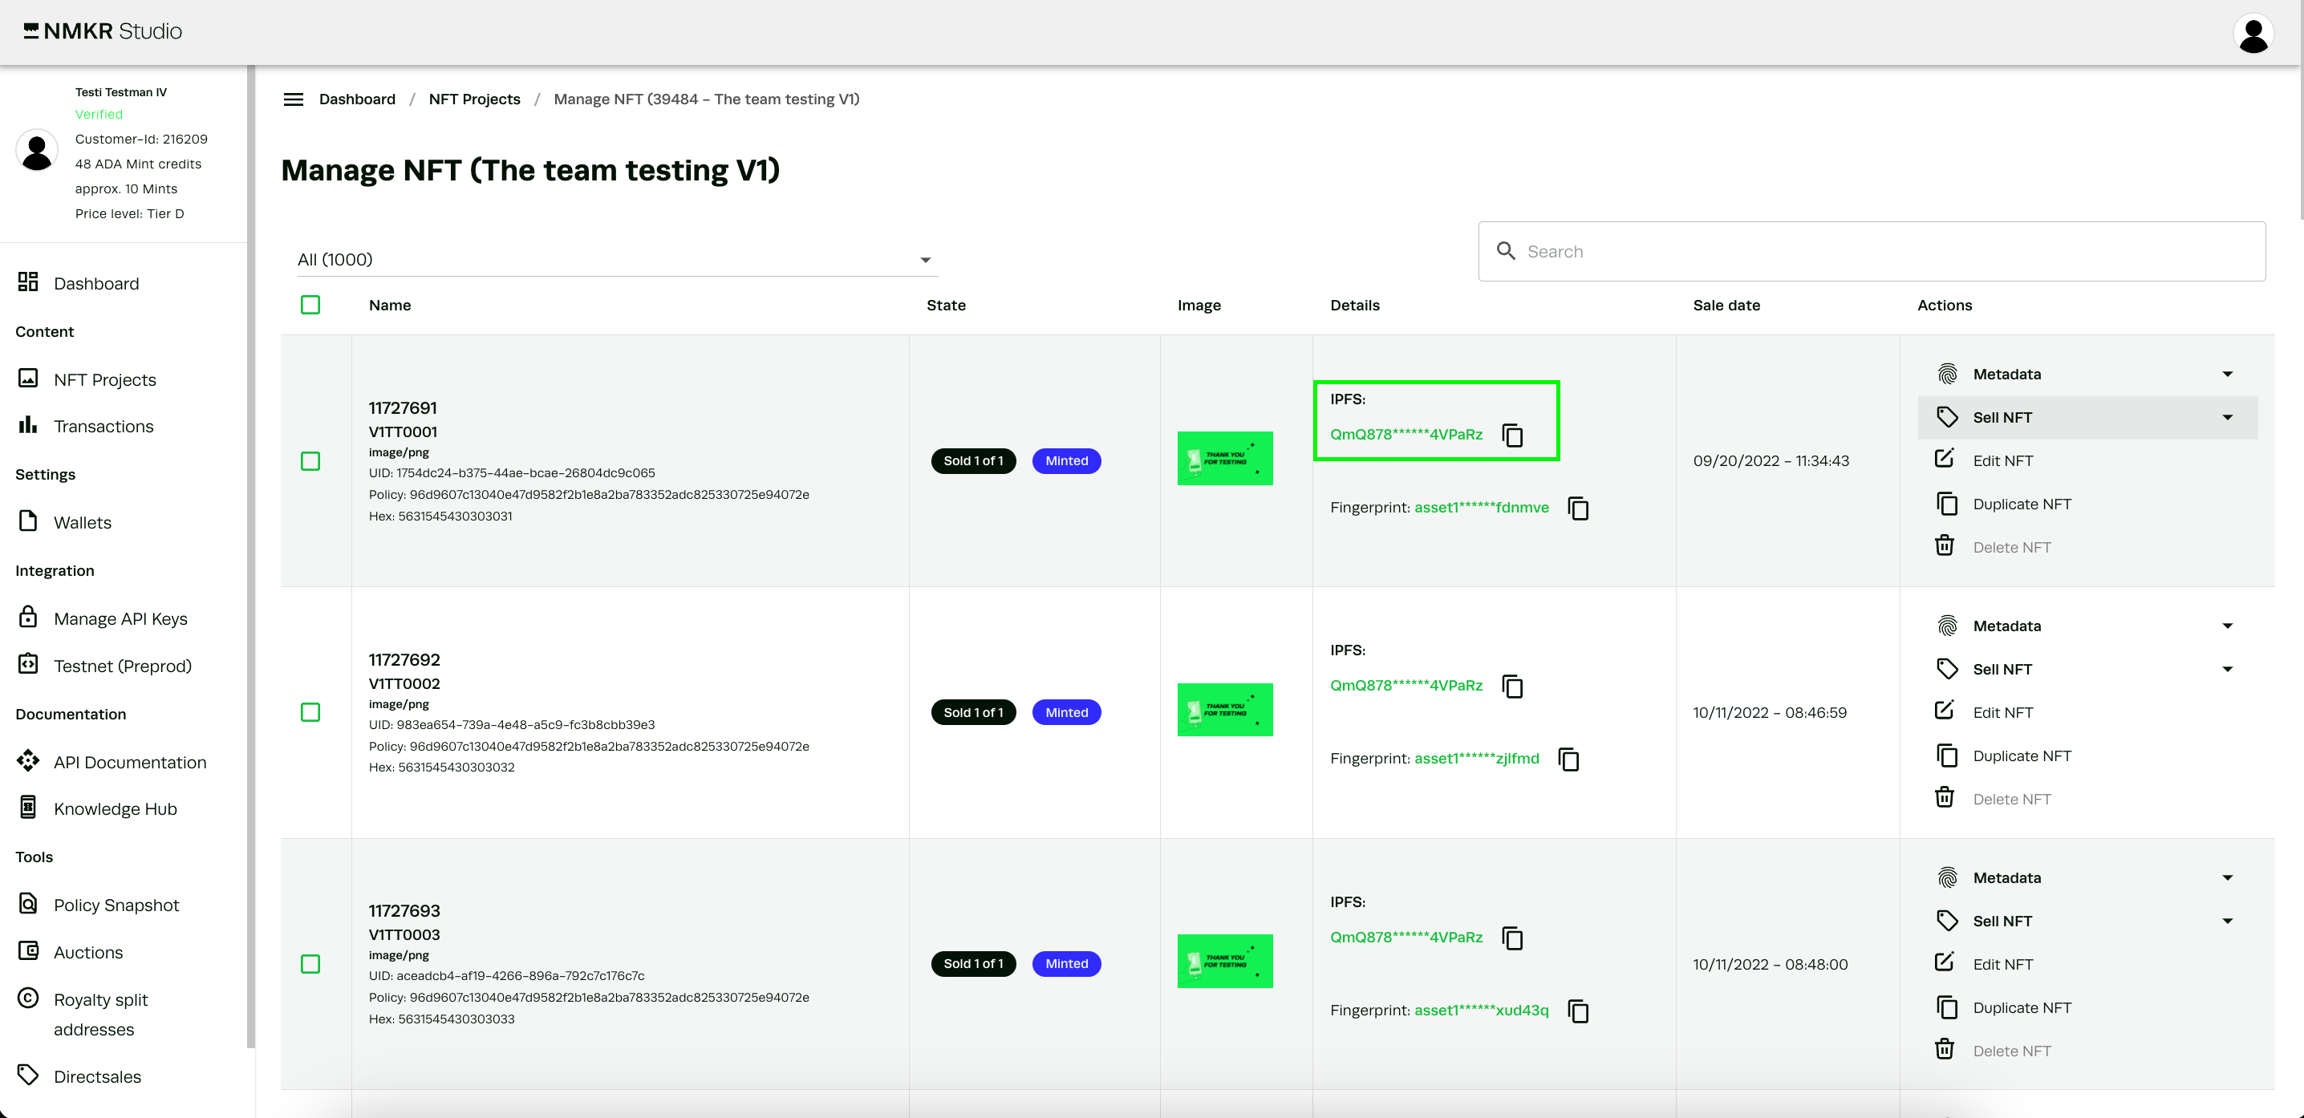
Once the NFT is uploaded, you can then see its details or view its metadata, from which you can copy the IPFS hash, ready to paste into the metadata of the NFT we are going to remint.
When you paste the new link, make sure that the format looks correct before pressing the mint button.
Please make sure to replace the IPFS hash of your file also in the file section of the metadata, or you will only replace the thumbnail of your NFT
Well done, you have now successfully edited an NFT after it has been minted!
Fix tokens in bulk after mint
For now, there is no option in NMKR Studio to update the whole project in one go, you will have to reach out to us after preparing your project. However, you can update your project in batches of 100 tokens at once.

There are different workarounds to update the metadata of your project in bulk, please read the following workarounds carefully and decide which makes sense for you.
Prepare for bulk update via Metadata template
As you know the values and structure of the Metadata Template applies for every token in the project, therefore it can make sense to adjust the Metadata template in order to update all your tokens with the same values. This workaround makes sense, for example if you need to change the description or any field names. Please read here to learn how to adjust the Metadata template of your project. Push the changes on-chain in the next step.
Prepare for bulk update with SFTP
This workaround makes sense to fix structural issues or images in bulk.
The updating in bulk follows the same process as the fixing of single tokens. You need to update the metadata of the tokens. To update the metadata of the tokens in bulk, we recommend using the Bulk upload via SFTP to replace the metadata of the tokens. Delete the old metadata of the project before uploading the new correct version of the metadata. If you need to fix the pictures of your project in bulk, you can create a duplicate of your project but with the new images. For this workaround, create a project that has the same policy ID as the original project. After uploading all the files and metadata, you can now use the "export metadata in a zip" function to download the new metadata, but without any placeholders.
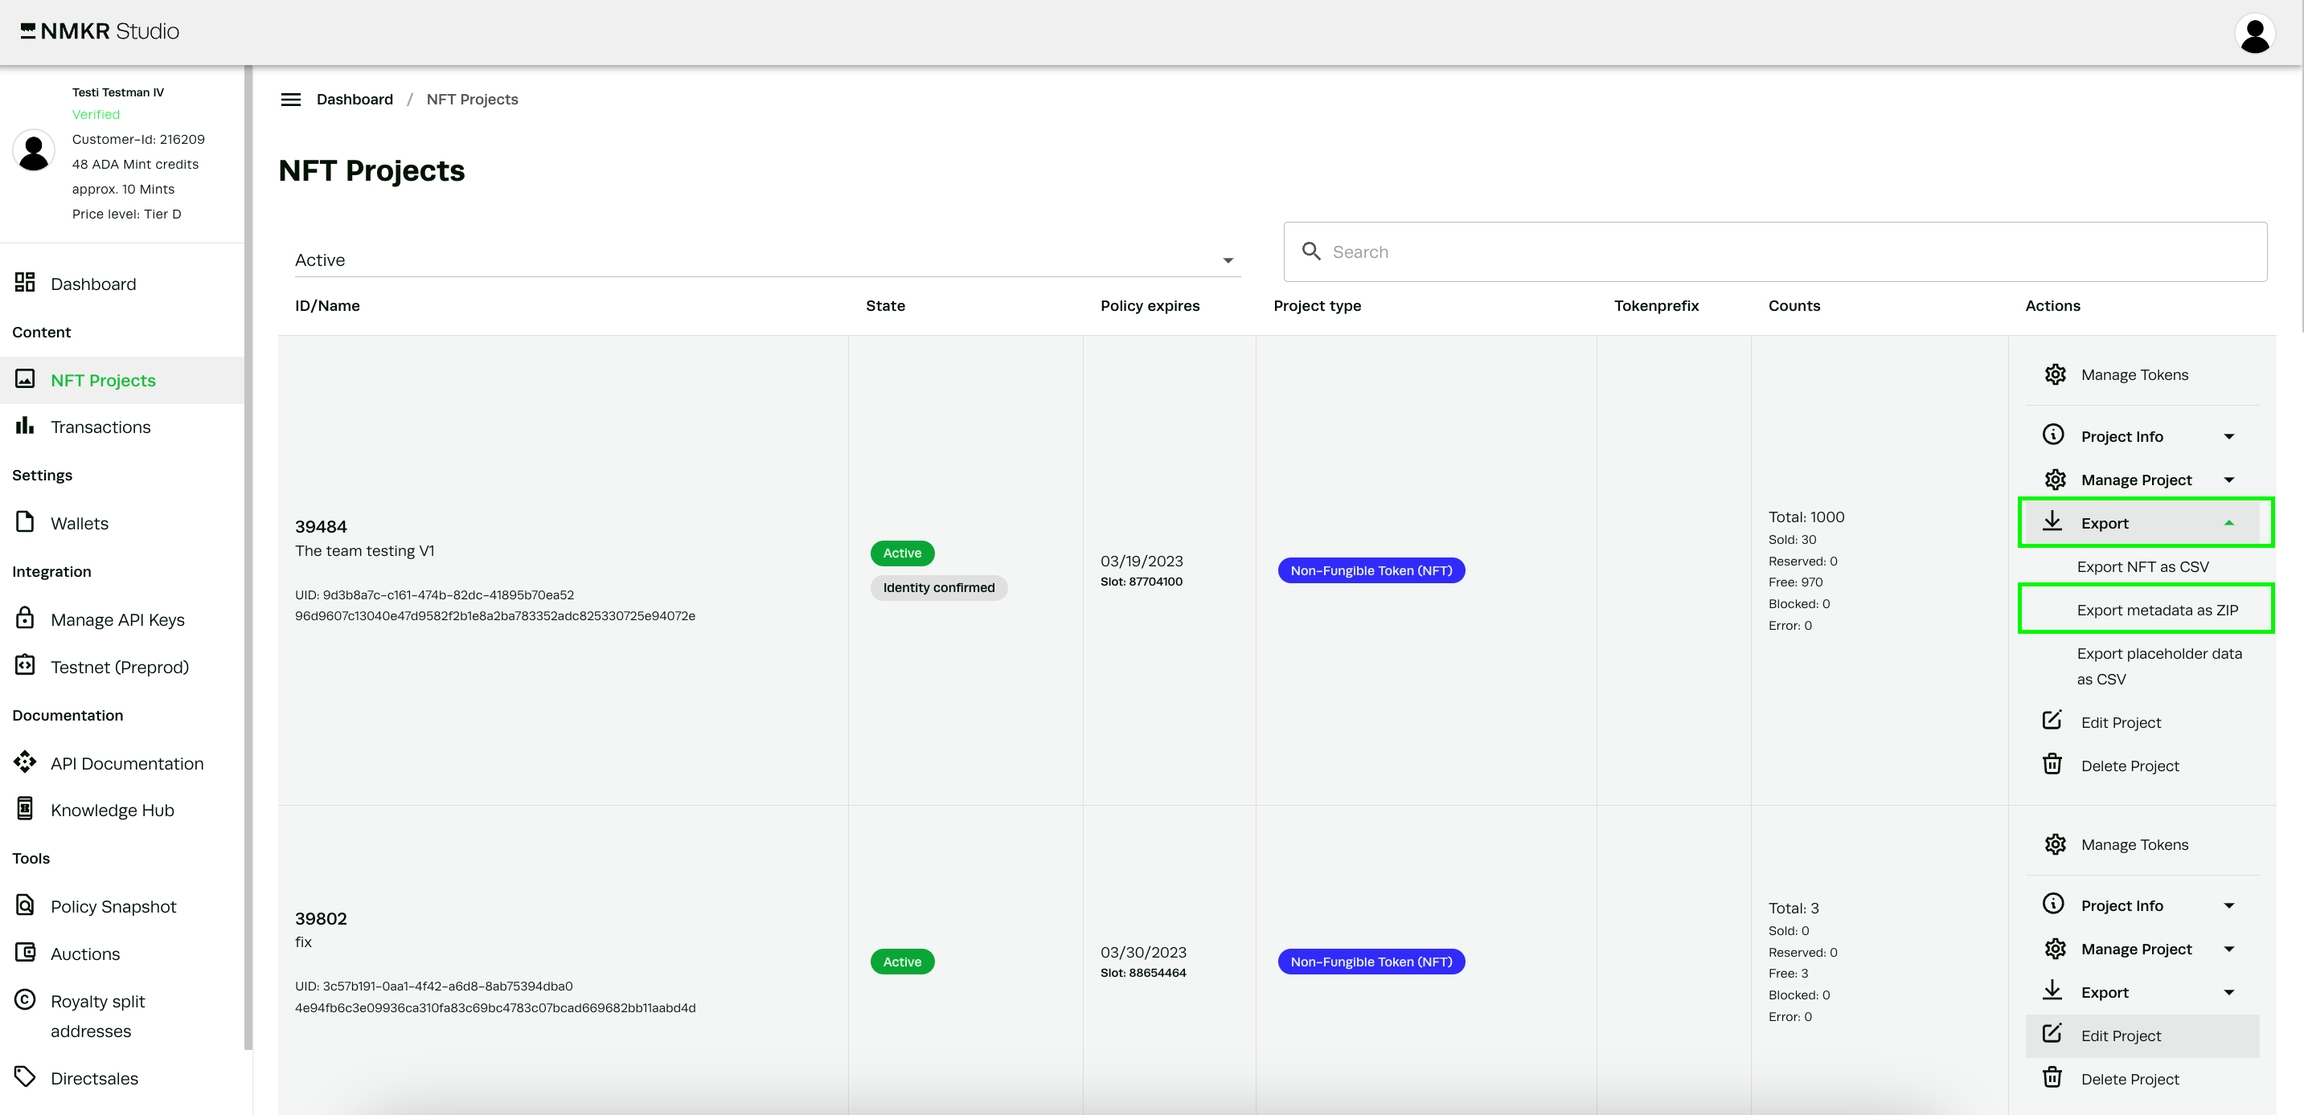
This new metadata files contain the new IPFS hashes of your images and can be easily used to replace the metadata of your original project via SFTP Bulk upload. Please make sure to delete the old metadata files before uploading the new ones. Push the changes on-chain in the next step.
Prepare for bulk update with placeholder.csv
If you don't need to make any structural changes to your metadata, but to fix e.g. typos in bulk it could make sense to use the placeholder.csv workaround. In order to do so, please download the placeholder.csv of your project first. The button can be found in the Actions bar of your project on the NFT Projects Tab.
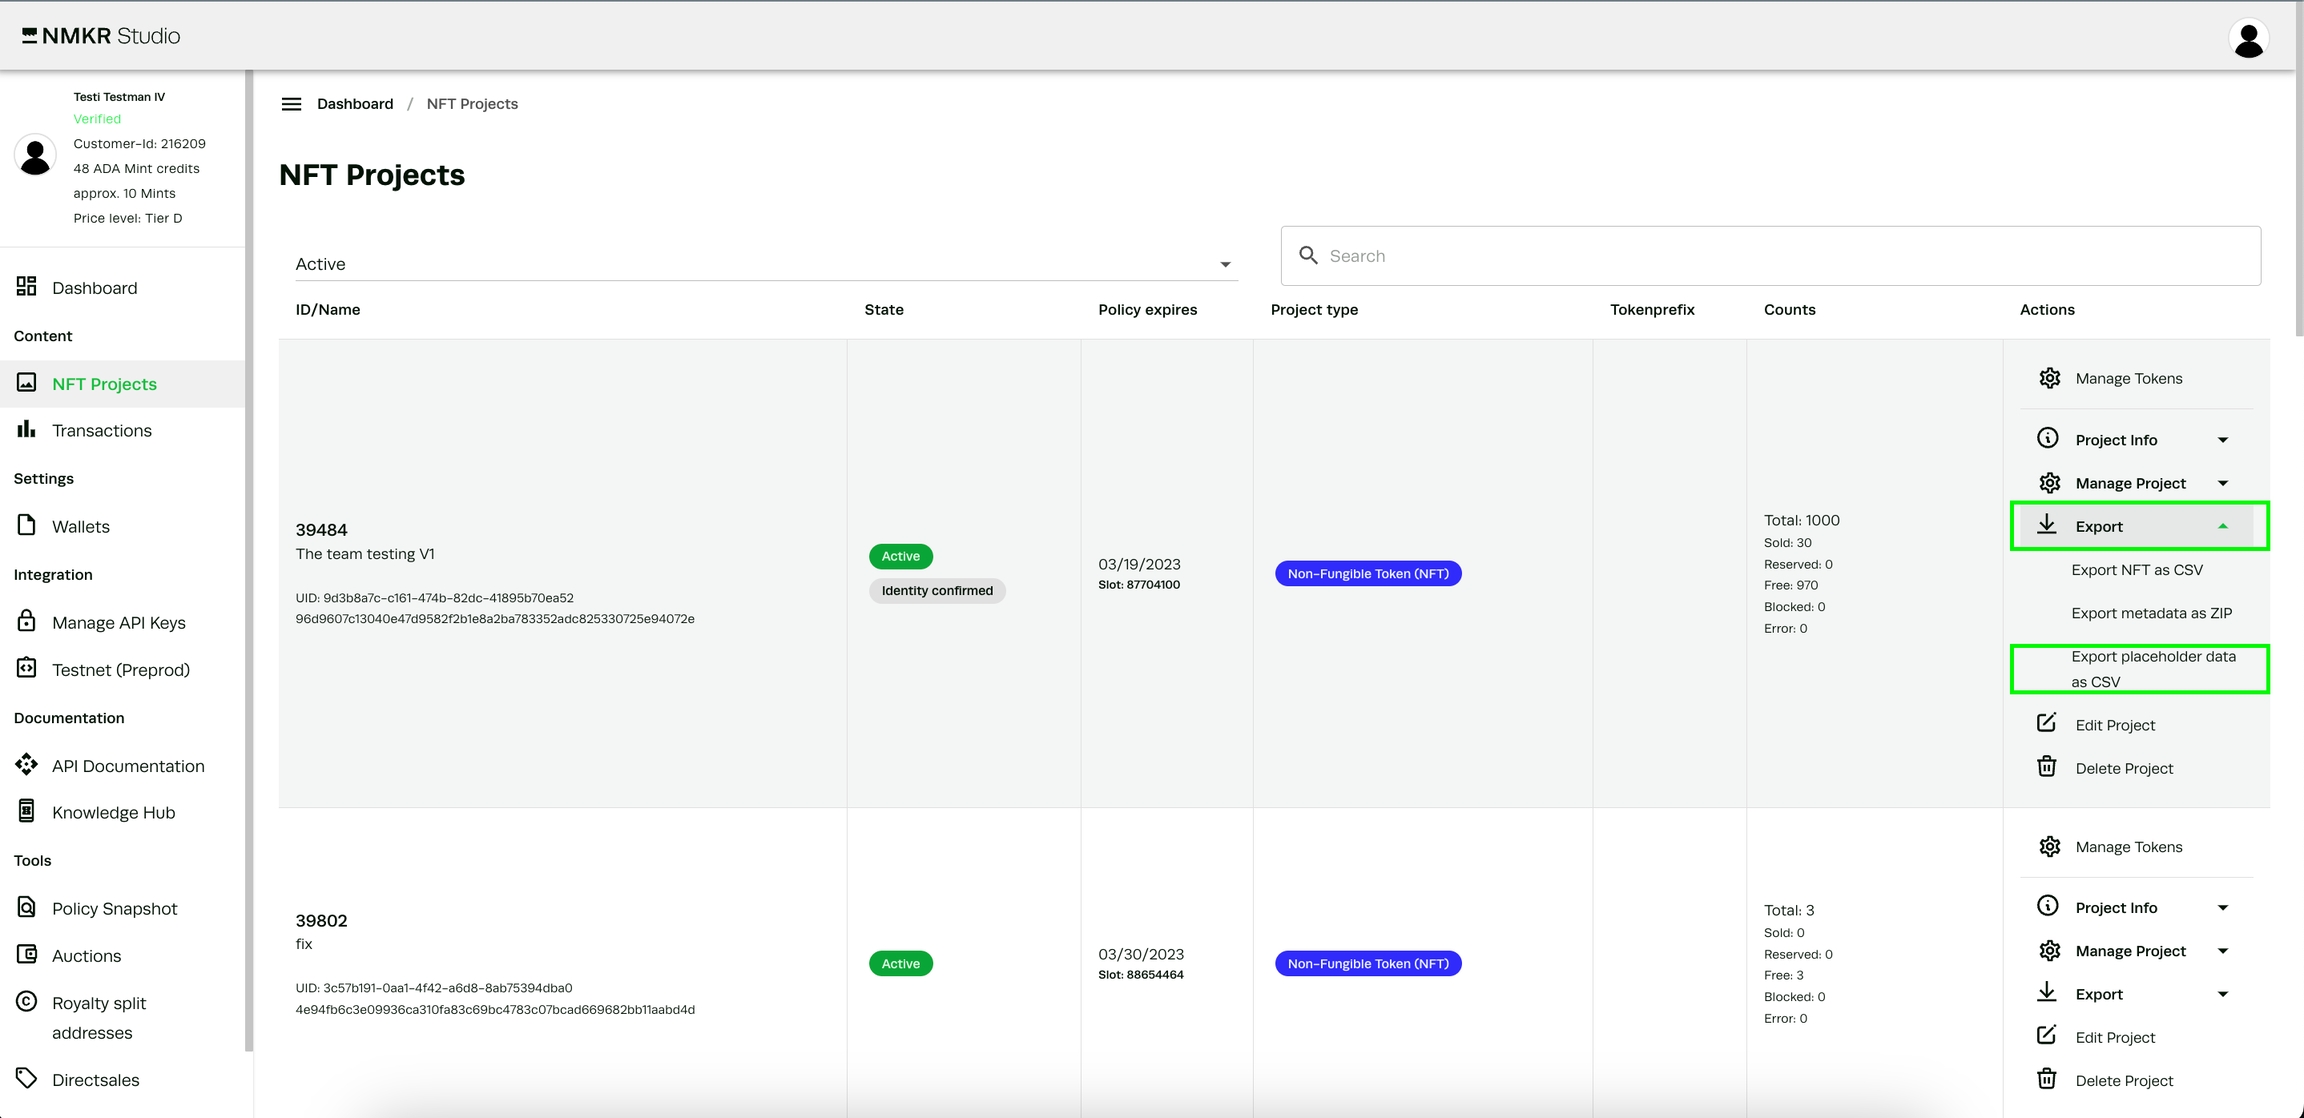
The downloaded file allows you to easily use the "find and replace" function of Excel or google sheets to find and replace the errors with the correct values. After you fixed all errors, save the file as placeholder.csv and reupload it to your project via SFTP upload.

The final step is to add 2ADA for every NFT that needs to be updated to your accounts balance and start the updating process for the selected tokens in bulk. The feature can be found in the drop down selection of the Manage NFT tab.
Push the changes on-chain in the next step.
Reveal tokens after sale (in bulk)
For now, there is no option in NMKR Studio to update the Tokens in bulk, you will have to reach out to us after preparing your project.
Upload the NFTs of the project with the correct images the tokens should have after the reveal. Then create a separate test project and upload the placeholder image that the tokens should have at the time of the sale. This project can be deleted afterwards, it is only to get the IPFS hash of the image that you want to use as placeholder image during the sale. You find it in the metadata of the token by clicking the show metadata button, or you can directly copy it from the overview in the Manage NFT Tab.

The next step is to edit the metadata template of the project. There, you will now replace the <ipfs_link> with the hash of the placeholder image from the test project. In case you want to reveal custom fields(traits) together with the image after the sale, please also replace the placeholders of the custom fields with a "value" ( e.g. "wait for reveal").
To prepare the project for the reveal, simply replace the IPFS hashs again with the <ipfs_link> placeholder. The same with the placeholders of the custom fields. NMKR Studio will now be able to replace the placeholders with the individual values of the Tokens metadata during the remint and burn process. Now you are going to add 2ADA for every NFT that needs to be updated to your accounts balance and start the updating process for the selected tokens in bulk. The feature can be found in the drop down selection of the Manage NFT tab below your tokens overview.
Push changes on-chain
Select the tokens individually, or use the "all" button to checkmark all tokens on the page. Specifying the amount of tokens that can be shown on one page helps you to remint and burn up to 100 tokens in one go. For very big projects, please open a ticket, but please plan 3-4 working days for us to update the project for you.

Last updated