Website Integration
Integrate NMKR Pay easily to your website via HTML
NMKR Pay can be integrated to any website by adding a HTML snippet to your website. Besides the single Token payment, you can also add quantity options where your customer selects the amount of tokens he want to buy from the dropdown.
NMKR Pay won't work embedded in a HTML iframe tag. If you embed NMKR Pay in an iframe it won't be able to communicate with your browser extensions.

Standard Pay button integration
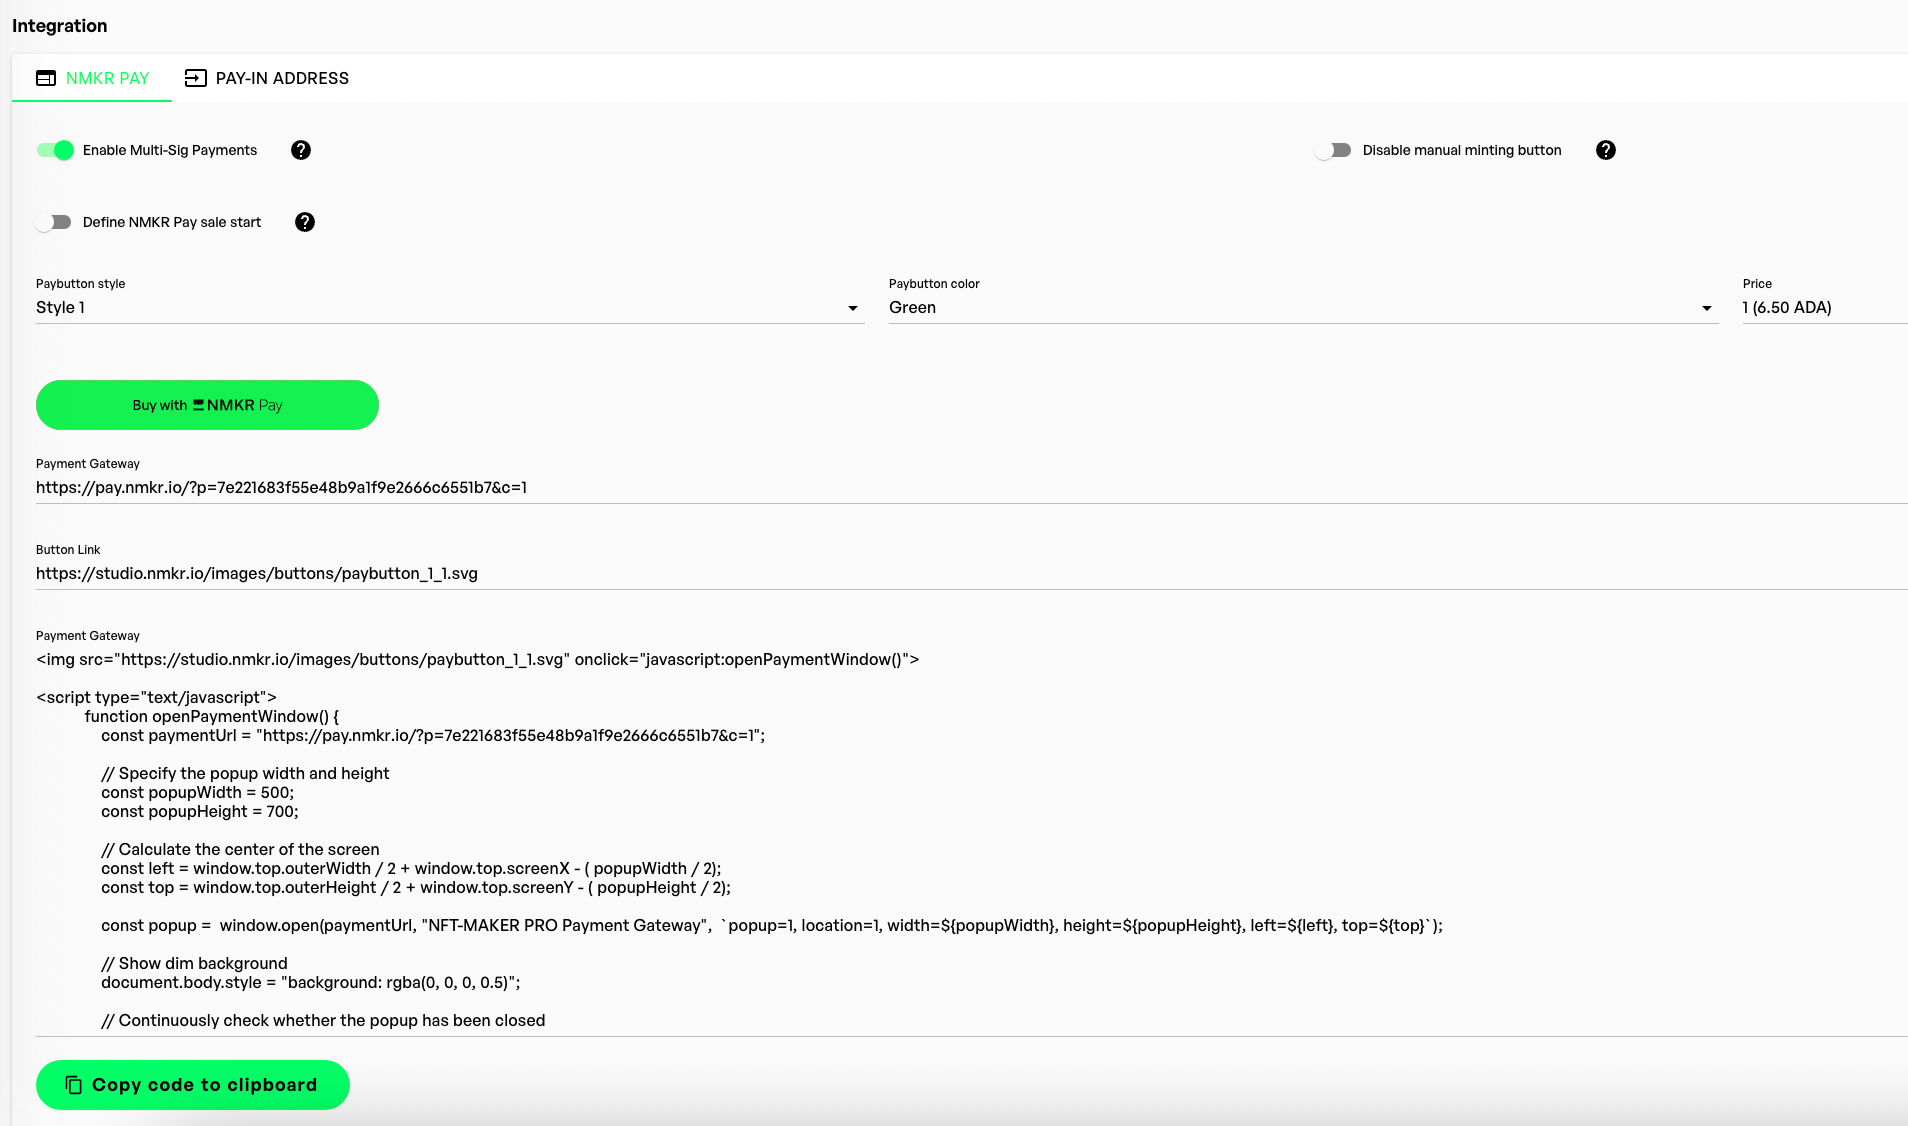
For the NMKR Pay integration, please go to the price list settings of your project and to the NMKR Pay integration tab.

After you created your prices and set up NMKR Pay, you are now ready to integrate NMKR Pay to your website.
specify pay button design
The NMKR Pay button comes in three different designs and three different colours that can be selected in the dropdown. Depending on your selection the button link and also the HTML snippet that you can see below the links changes.

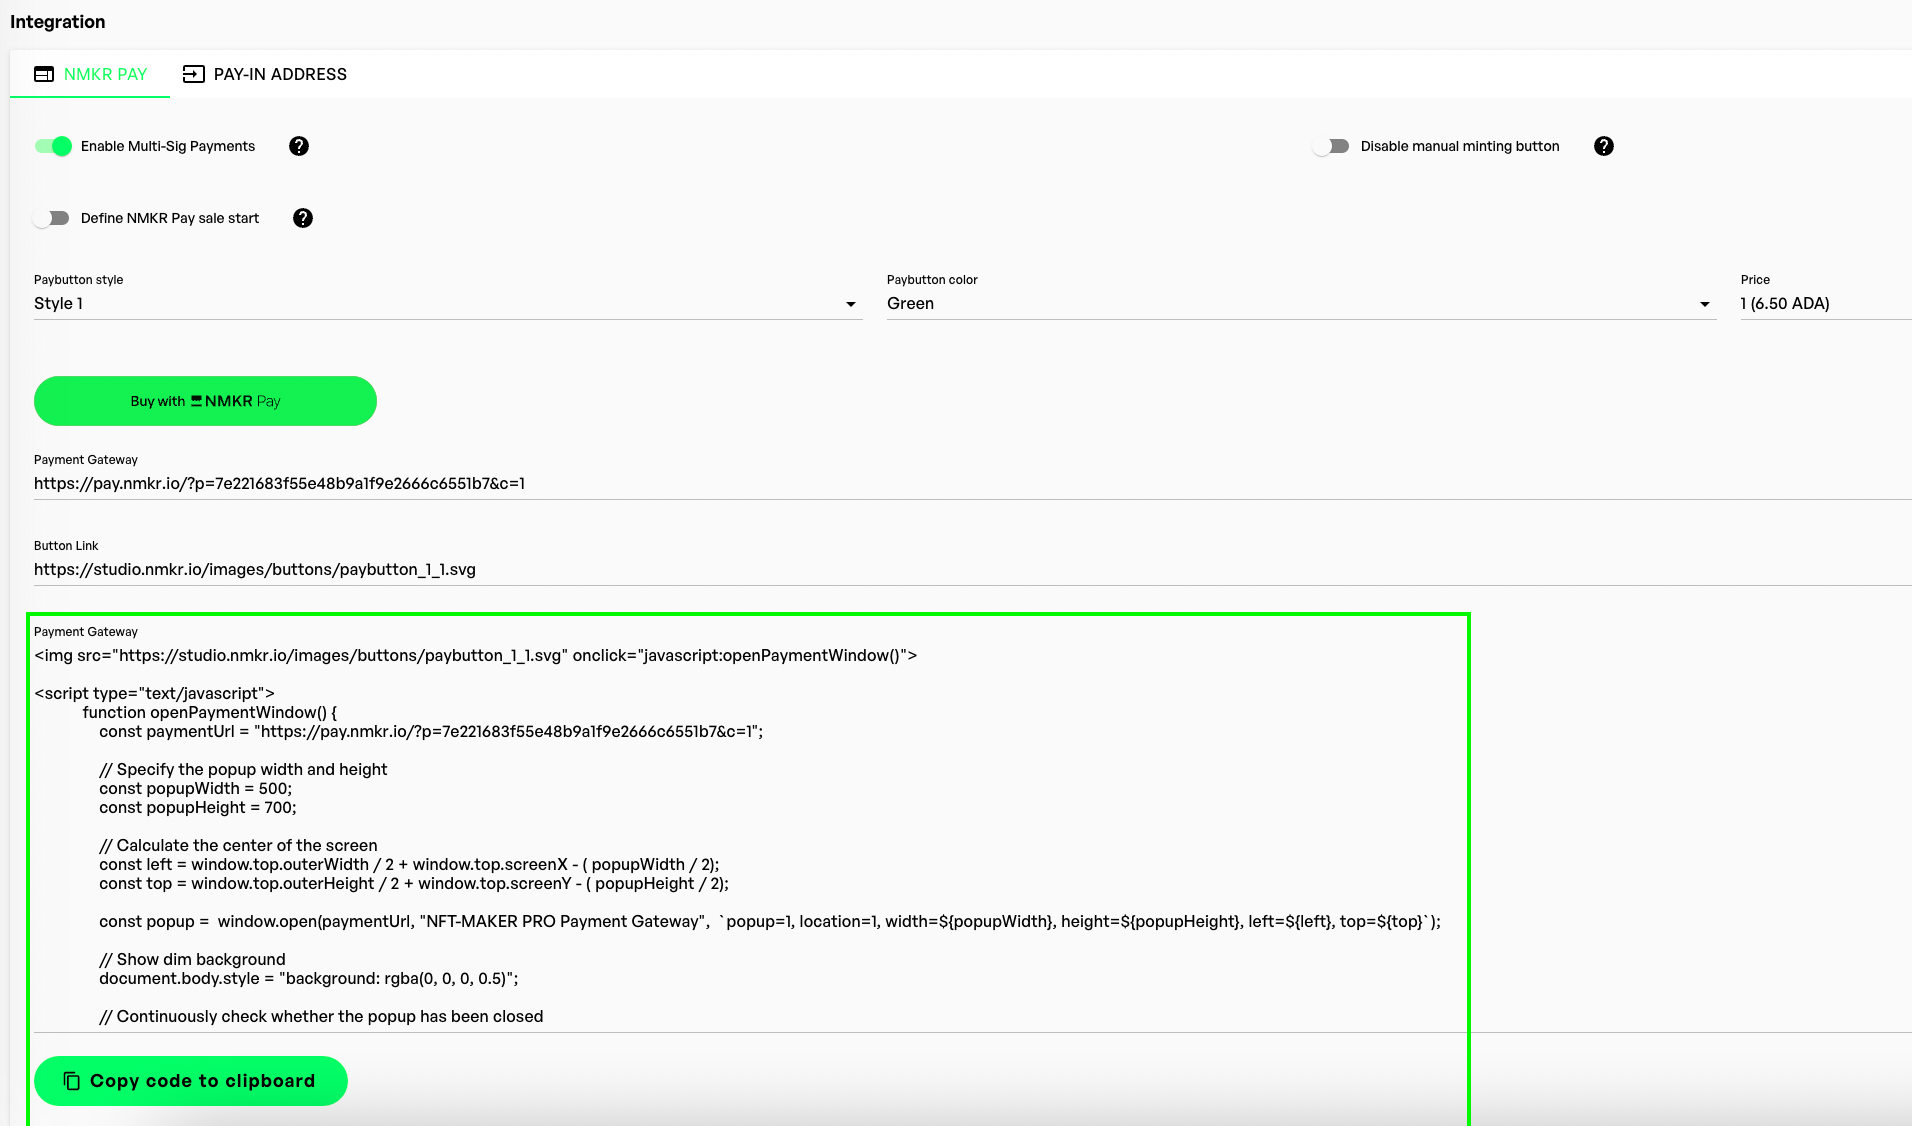
Copy and paste the HTML snippet
Click on "copy code to clipboard" and paste the code on your website.

If you're new to HTML or haven't edited website code before:
HTML (HyperText Markup Language) is the foundation of every webpage. It uses simple tags like <div>, <button>, or <section> to place and organize elements (text, images, buttons, etc.).
The NMKR Pay snippet is self-contained JavaScript + HTML that renders the button and handles wallet/fiat interactions. You only need to insert it into the right spot on your page—typically inside the <body> section, often within a <div> or custom block for positioning.
Most website builders (WordPress, Wix, Squarespace, Webflow, Shopify) have a "Custom HTML", "Embed", or "Code" block/widget where you can paste it directly. For custom sites, open your HTML file in a text editor and paste between <body> and </body>.
For a beginner-friendly explanation of HTML structure, tags, and how to add custom code to a page, check out this free guide from WebsitePlanet
It covers essentials like:
Basic page structure (<!DOCTYPE>, <head>, <body>)
Common tags (<h1>, <p>, <img>, <a>, <div>)
How to place elements exactly where you want them
This resource is straightforward, example-heavy, and perfect for understanding where to safely insert the NMKR Pay snippet without breaking your layout.
Quick Placement Tips
In a website builder: Look for an "HTML" or "Embed Code" element and paste the snippet there.
In raw HTML: Add it like this for better control:
HTML
Important: Do not place the snippet inside an <iframe>, as it prevents communication with browser wallet extensions (e.g., Nami, Solflare).
If you want to test it before you embed it to your website, try it with an online HTML tool. The following is an example HTML snippet that you would copy and paste it directly to your website.
Pay Button with quantity options

To integrate a quantity option to your NMKR Pay integration simply add the following snipped and extend with the quantity options (<option value="n">n</option>) you need for your project.
The second step is to change the parameter for the amount of the link in the HTML snippet that was copied from NMKR Studio from c=1"; to c="+NFT.value;

It will now look like this:
Only price/amount-pairs that are previously specified in the price list will work with the quantity options.
The following shows an example of an HTML integration with quantity option 1-5 NFTs per transaction.
Useful parameters for the payment link
By adding the parameter &pm=wallet or &pm=fiat at the end of your payment link, you would skip the step where the user selects what payment method he wants to use. &pm=wallet would lead directly to the payment via Cardano Wallet &pm=fiat would lead directly to the FIAT payment option, if enabled.
Example
Last updated